The Bottle Gourd: From Pilgrim Flask to Rattle & Lamp
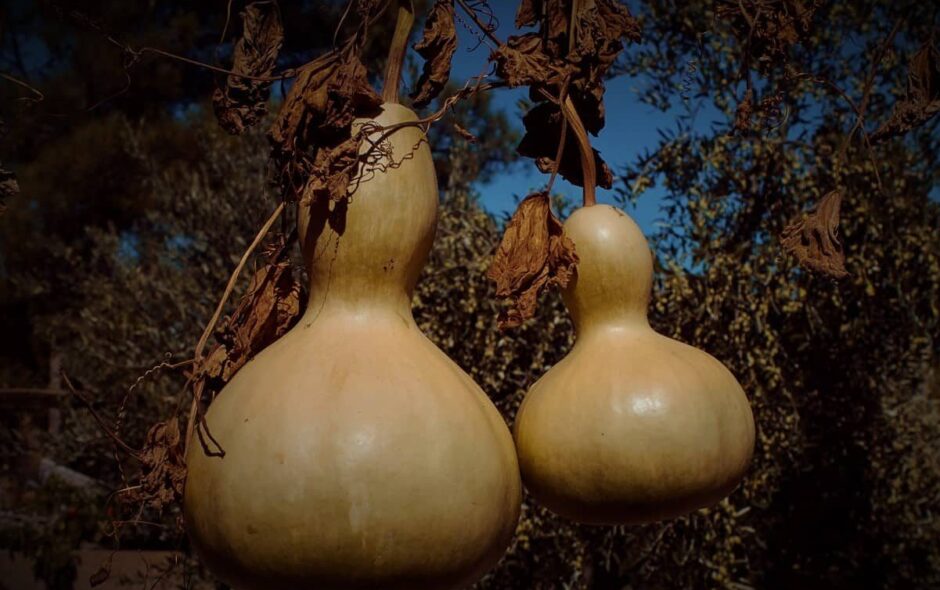
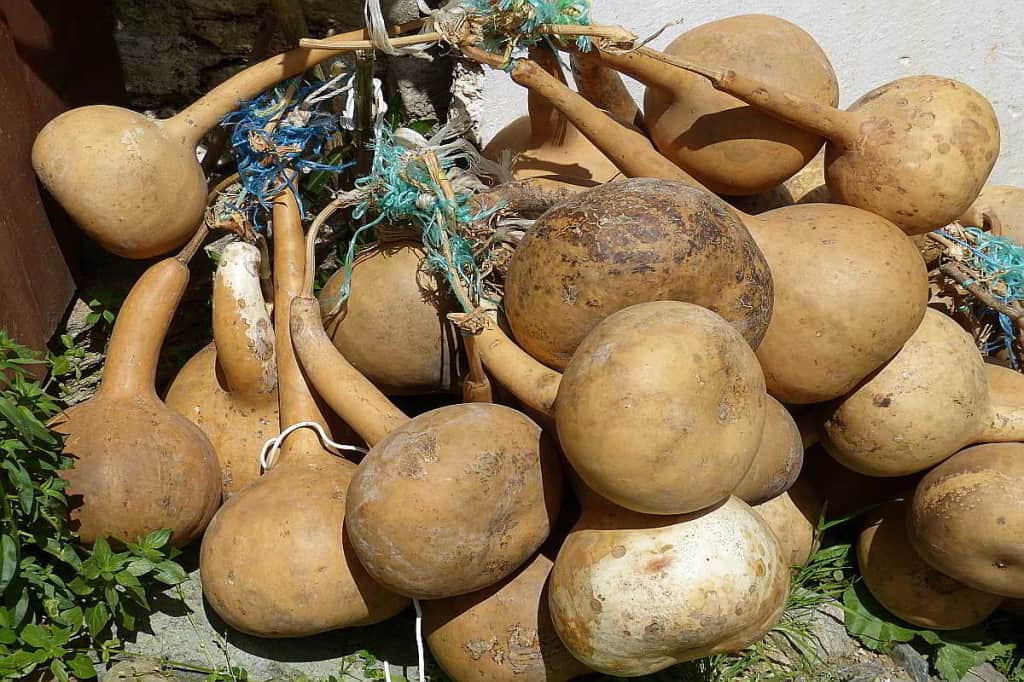
The Bottle Gourd (Lagenaria siceraria), also known as the Calabash, is nature’s perfect vessel. Once dried, these gourds last practically forever. To give you an idea of their durability: The oldest calabash in my personal collection is over 30 years old and still going strong.
These plants have been known in Europe since the Early Middle Ages, if not earlier—long before the common garden pumpkin arrived from the Americas. Bottle gourds were essential for transporting water, especially on long pilgrimages. Even Walahfrid Strabo, the famous 9th-century monk and poet (whom I have written about before), praised the Bottle Gourd in his horticultural masterpiece, the Hortulus.
What can you make from a dried Bottle Gourd?
The possibilities are as varied as the shapes of the gourds themselves.
Vessels: They make excellent soup bowls and water bottles.
Music: Smaller dried gourds function perfectly as rattles. For this, the gourd is left unopened after drying; the loosened seeds inside provide the rhythmic sound.
Light: They can be transformed into stunning, rustic lamps.
Building a Lamp: To make a lamp, you simply cut away a portion of the bottom. How much you remove depends on your taste—whether you prefer a wide beam of light or a focused glow.
Practicality: Ensure the opening is large enough to easily change the light bulb and to allow the cord and socket to pass through.
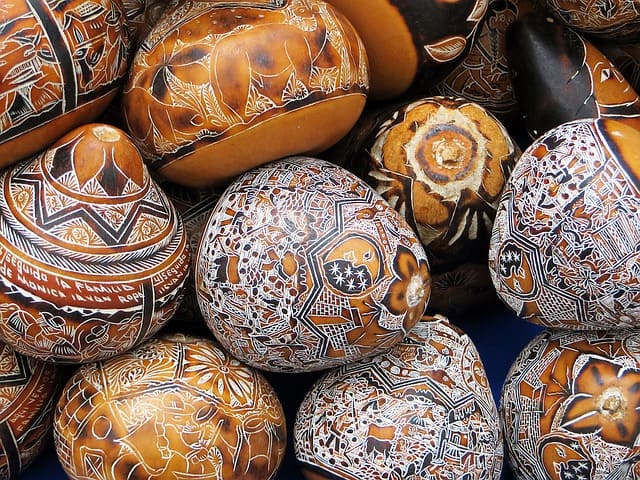
Decoration: You can paint the lamp or decorate it with Pyrography (wood burning). While I haven’t tried wood burning on them myself yet, it is a traditional way to adorn them.
How to Process a Bottle Gourd
1. The Harvest & Drying
If you grow the Calabash in your own garden, cut them directly at the stem before the first hard frost.
Hanging: Hang the gourds in a warm, dry place. They need airflow.
Light: They should be bright, but not in direct, scorching sunlight.
Duration: This “Gourd Curing” takes patience—about three months.
The Test: You know they are ready when you shake them and hear the seeds rattling inside.
2. Cleaning & Opening
Once fully dried, the shell becomes wood-like.
The Cut: Cut off a piece of the “neck.” The diameter must be large enough for the seeds to fall out. Alternatively, you can cut directly above the “belly” to create a bowl instead of a bottle.
The Scouring: To remove the dried pulp and seeds from the inside, fill the gourd with a handful of gravel or small pebbles. Shake it vigorously! The stones will loosen the dried flesh.
Emptying: Pour out the stones, pulp, and seeds.
Tip: Save the seeds! You can use them to grow next year’s generation of bottles.
3. Dealing with Mold
During the long drying process, it is common for the gourds to develop a light layer of mold on the outer skin. Do not worry; this is part of the process. Simply wipe it off with a damp (not wet) cloth.
Properties & Use as a Flask
The flesh of the gourd becomes very hard and watertight upon drying. If you wish to make bowls or cups, you can scrape the inside smooth after opening.
The dried Bottle Gourd is tough. It can be dropped without breaking, is frost-proof, water-resistant, and is said to even withstand heat. It keeps cold drinks pleasantly cool.
The Pilgrim’s Bottle: To finish your bottle, seal it with a cork or a wooden plug. You can tie a leather cord or string around the neck to carry this natural canteen on your travels.
Sealing (Optional): Some crafters seal the inside of the bottle with Brewer’s Pitch or Beeswax to ensure it is absolutely watertight and neutral in taste. I have not done this myself, as the natural shell works well, but it is a common practice. In any case, you now have a completely natural drinking vessel—100% plastic-free and chemical-free.
Care Instructions:
Contents: It is best to fill the flask only with water or unsweetened tea.
Avoid: Do not use it for milk-based or sugary drinks, as they are hard to clean out and can spoil in the pores.
Cleaning: Rinse it out like a normal bottle and stand it upside down to dry. A bottle brush helps with thorough cleaning.